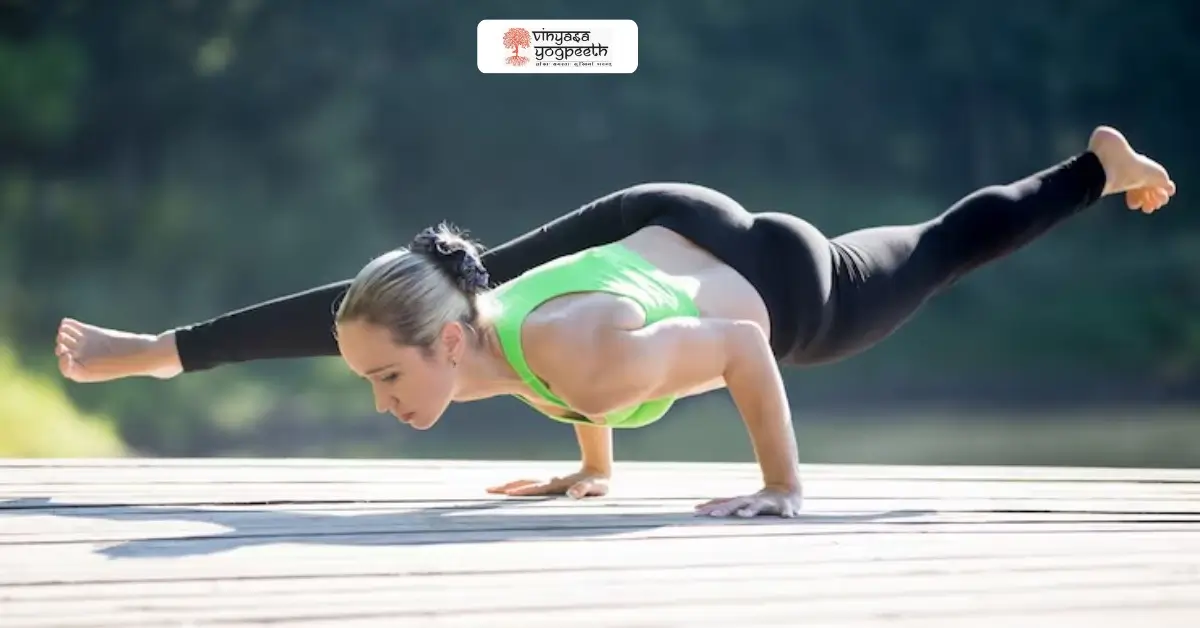
A forearm balance with the feet curling over the head stops people mid-sentence in any yoga class. Students who see it for the first time usually ask two things. How does anyone get there, and is it safe? This guide answers both. You will learn what the posture is, what your body needs before you try it, how to build toward it, and where most people go wrong.
At Vinyasa Yogpeeth in Goa, we teach students from many countries, including the USA. Students often ask us about the scorpion pose, so we explain it here the way we would on the mat: slowly, with close attention to the shoulders.
What is Vrischikasana (Scorpion Pose)?
The name comes from two Sanskrit words. Vrischika means scorpion, and asana means pose. In the final shape, you balance on your forearms, arch the spine deeply and let the feet drop toward the head. The legs look like a scorpion's tail curled over its back.
Teachers call this asana advanced because it asks for two hard things at once. You balance upside down on a small base, and you hold a deep backbend while you do it. B.K.S. Iyengar describes the pose in Light on Yoga. Some traditions also teach a second version on the hands instead of the forearms. This guide covers the forearm version, which is where everyone starts.
What the Pose Asks of Your Body?
Many students assume the scorpion pose is mostly about flexibility. Flexibility helps, but a bendy person with weak shoulders will collapse, and a strong person with a stiff upper back will stall halfway into the bend. A steady scorpion pose needs four qualities working together.
Shoulder strength: Your shoulders and forearms carry your full body weight, often for several breaths.
Shoulder mobility: Your arms need to reach overhead without the ribs flaring or the lower back sinking. Tight shoulders push the bend into the lower spine, where it causes the most trouble.
Upper back extension: The backbend should spread across the whole spine, not collect in one spot.
Core control: The abdominals and hip flexors keep the ribs down and let you lower the legs under control instead of dropping them.
Are You Ready to Try It?
No exam decides this, but a few checkpoints help. You can hold a forearm stand for about a minute without the wall, with the ribs drawn in and no wobble. You can move into camel pose and wheel pose with smooth breathing and no pinching in the lower back.
You have no current pain in the shoulders, neck or spine. Many teachers also like to see around a year of regular practice first. Treat that as a rule of thumb, not a rule.
Progress in the scorpion pose in yoga depends less on how long you have practised than on how well you control the basics. If a checkpoint feels shaky, you are not behind. You have simply found your next piece of work.
Preparing Your Shoulders, Spine, and Core
Each drill below trains one piece of the scorpion pose.
Shoulders
Dolphin pose and dolphin push-ups build strength and overhead reach. Extended puppy pose opens the shoulders and upper back. Forearm plank holds teach your forearms to push into the floor, which is the exact action you need when you are upside down. Practise forearm stand at a wall and aim for one steady line from shoulders to heels.
Spine
Camel pose, bridge, wheel and upward-facing dog all train the backbend. Notice where the bend happens. If you feel it all in one spot in the lower back, slow down and think about lifting the chest instead. Gentle backbends over a rolled blanket under the upper back can help open that area.
Core
Forearm plank and side plank build the trunk strength that keeps the ribs from flaring. Slow leg lowering from a lying position teaches you to control the legs as they travel, which matters when your feet start moving toward your head.
A Simple Warm-Up
Before you attempt the scorpion pose, spend ten minutes on wrist and shoulder circles, cat-cow, a few sun salutations, dolphin pose and one or two rounds of camel. Cold shoulders and a stiff spine invite strains.
How to Practice the Scorpion Pose?
Practise with a wall behind you, and keep a teacher nearby for the first few sessions. The steps below describe the wall-supported scorpion pose.
- Set up: Place your forearms on the mat, parallel, with the elbows under the shoulders. Leave enough room to walk your feet down the wall later.
- Lift into forearm stand: Tuck your toes, raise the hips and kick up one leg at a time until your heels rest on the wall. Press the forearms into the floor, lift the shoulders away from the ears and look at the floor between your hands.
- Organise your lines: Draw the ribs in, squeeze the legs together and press up until the body feels tall. Everything that follows depends on this step.
- Start the bend: Bend the knees and let the feet slide down the wall as your chest lifts and travels forward. Move slowly. The curve should feel long and even, not like a fold at the waist.
- Hold and breathe: Keep pushing the floor away, look forward and breathe. Stay for three to five breaths. A short hold done well beats a long hold done badly.
- Come out under control: Straighten the legs back up the wall into forearm stand, then lower one foot at a time. Rest in child's pose.
Students often spend many weeks at the wall before they try the scorpion pose away from it, and then only with a spotter. The first time you reach the full shape, it may last a breath or two. That is normal.
Common Mistakes and How to Fix Them?
Most mistakes in the scorpion pose trace back to rushing.
- Collapsing into the lower back: Lift the shoulders higher, draw the ribs in and bend less.
- Sinking into the shoulders: When the shoulders sag toward the floor, the neck starts to take load. Keep pushing the floor away.
- Letting the elbows drift wide: Keep them about shoulder-width apart and stacked under the shoulders.
- Holding the breath: A held breath tells you the pose is beyond you today. Back off until the breath runs smoothly.
- Forcing the feet toward the head: Depth comes from strength and mobility. Chasing it with force is how backs get hurt.
- Dropping out of the pose: Leave the way you arrived, slowly and in control.
Fix one fault at a time. A cleaner scorpion pose comes from small corrections, not from bigger effort.
Scorpion Pose Yoga Benefits: What Practice Can Realistically Give You?
The strongest gains are physical and practical. Training for the scorpion pose builds strength in the shoulders, arms, upper back and core. It also improves mobility in the shoulders, spine and hip flexors, and it sharpens balance and body awareness, because you cannot hold it while distracted. Many students describe a calm, narrow focus on the mat while they work on it.
You will also find online claims about hormones, glands and fat loss. These claims lack solid research support, so we leave them out. The real benefits come from the work of getting ready, and you collect them even if you never reach the full shape.
Who Should Avoid It?
Talk to your doctor before you try this pose, and skip it if you have any of the following:
- A shoulder, neck or spinal injury, or ongoing pain in those areas
- High blood pressure or a heart condition
- Glaucoma or other eye-pressure problems
- Pregnancy
- Recent surgery, or frequent dizziness
Skip the scorpion pose on days when you feel unwell, exhausted or distracted. Stop straight away if you feel pinching in the neck or lower back, tingling in the hands or lightheadedness.
Practising in Goa's Heat and Humidity
Goa's warm, humid weather changes how this pose feels. Sweat makes forearms slippery, so use a non-slip mat and keep towels off the mat under your forearms, where they can slide. Practise in the cooler early hours and drink water before and after. Students who fly in from the USA and elsewhere may also be jet-lagged. Give your body a few days to settle before you work on inversions, and take the scorpion pose slowly while you adjust.
How Long Does It Take, and Where to Learn?
There is no standard timeline for the scorpion pose. Some students reach the wall version within a few months. Others need years, and plenty gain a lot from the preparation without ever needing the full shape. A sensible order is forearm stand and backbends first, wall work second, and freestanding practice last, with a spotter.
A teacher can spot ribs flaring or elbows drifting before you feel them yourself. If you want that kind of regular feedback, the 100 hour yoga teacher training in Goa and the 200 hour yoga teacher training in Goa at Vinyasa Yogpeeth give you structured daily asana practice under a teacher's guidance.
Students who see the scorpion posture as a long-term goal can start the groundwork right away, and our teachers can tell you where your practice stands. You can also read about the best yoga school in Goa to see how we teach.
Final Thoughts
The scorpion pose rewards patience more than talent. Build the shoulders first, bend second and never chase depth. Practise with a wall and a teacher, respect your limits and let the preparation do its quiet work. When you want guidance on the mat, you can find us at the Vinyasa Yogpeeth home page